Sensors
Main page
Figure 1 – main page of chapter SENSORS
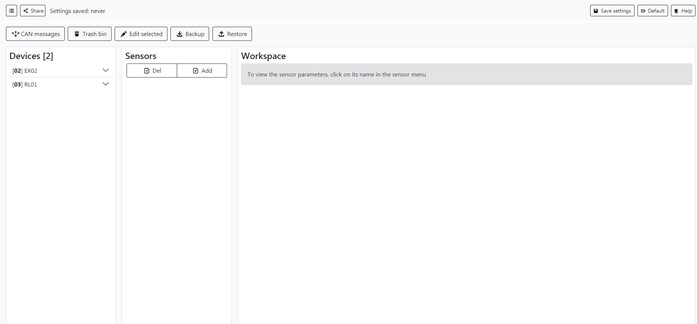
This chapter allows you to see which devices are connected to mNVR, check out CAN messages, add sensors or delete them, if there are a necessity you can restore them from trash bin
Devices
Figure 2 – menu Devices
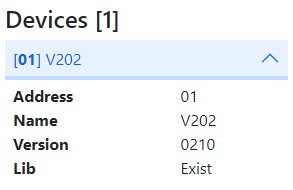
In menu devices you can check information about devices that are connected to the NVR, their CONNCECT ID, name, version of firmware of devices, and see if there are presets to this device
Deleting sensors
Figure 3 – menu deleting sensors
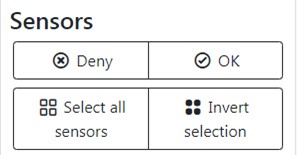
You can select a couple of them, or choose all, or invert selection and delete sensors which you want, deleted sensors will be moved to trash bin
Trash bin
Figure 4 – menu trash bin
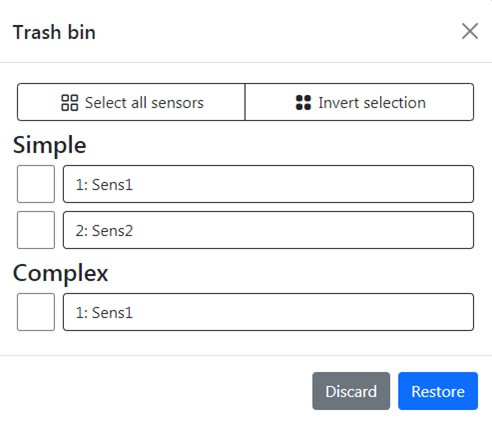
If you accidentally delete some of your sensors or want to restore old you can do it by trash bin menu, you need to select desired sensors and press restore button or discard if you change your mind
Workspace
Figure 5 – Workspace
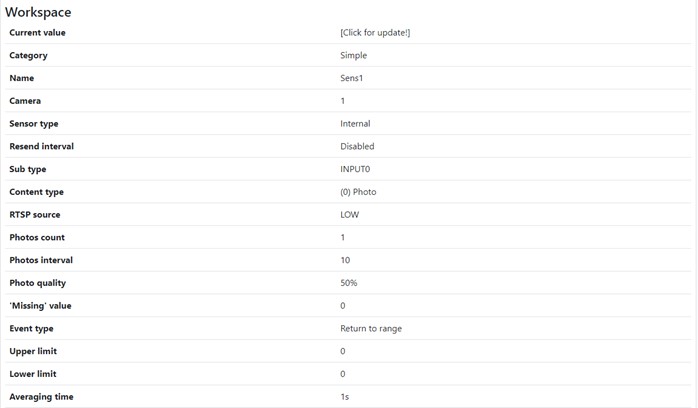
There you can check information about your sensor, it current value, category, sensor type, type of content, etc. and if you want to change some parameters you can press Edit button and configure your sensor
CAN message
Figure 6 – CAN message
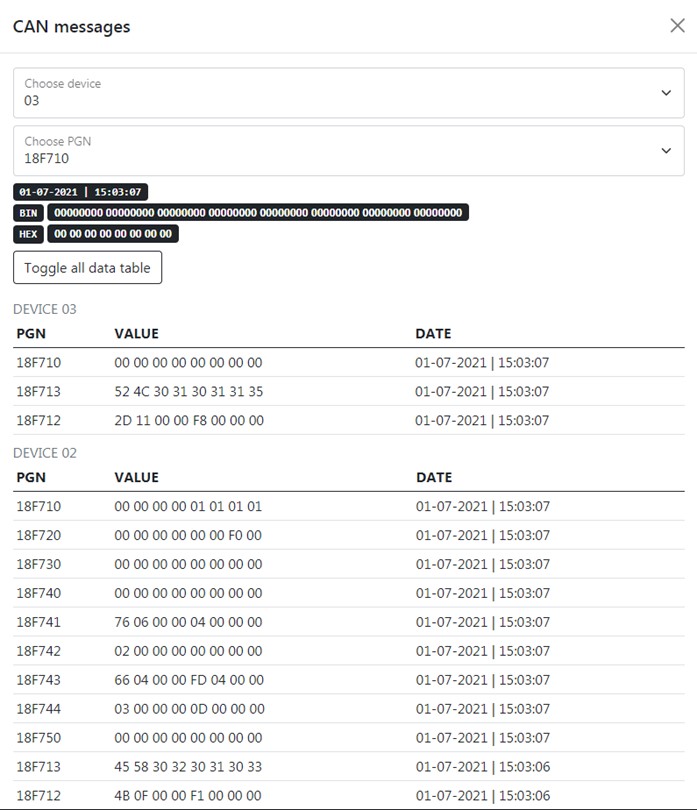
You can check the state of your devices by pressing CAN messages button, there you can choose the device which you want to check by choosing his address on CONNECT ID, and PGN and see the value which devices will be send. Value will be send in HEX system, to convert in DEC system you need to highlight it and lower right corner will be converted value

Also, you can press Toggle all data table button for more information
Libs manager
figure 7 – Libs manager
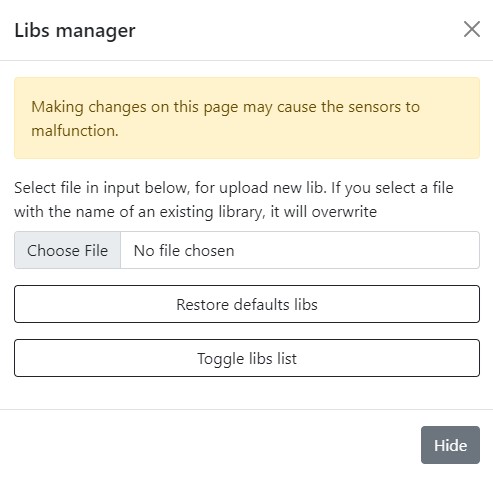
If you have a library, that you created manually, you can download it with the help of libs manager. To do that, you need to press Choose file button and download file of .xml format. To choose one of preseted libraries you need to press Toggle libs list button, to restore default libraries press Restore default libs
Bluetooth Low Energy (BLE) scanner adding
Figure 8 – BLE scanner
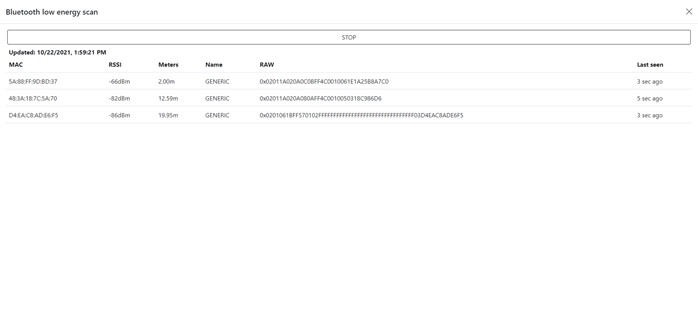
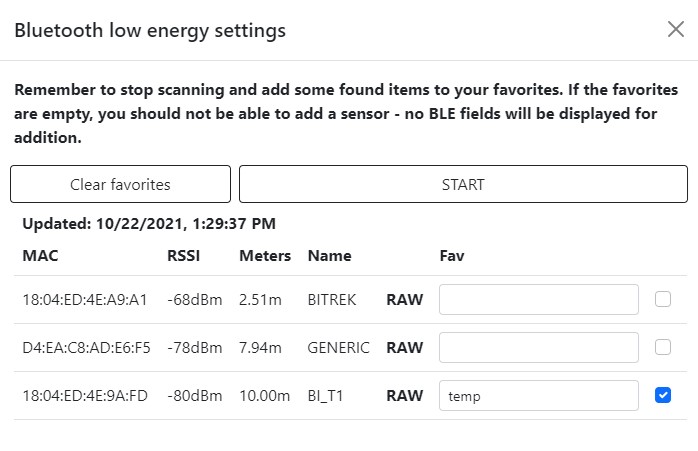
If you have BLE sensor you can connect it to mNVR. First you need to scan it by pressing BLE scan button and then press Start button, after that you can find the desired sensor in the list below, also in this list you can check the information such as: • MAC address • Signal quality level • Distance to the object (in meters) • Information about the signal • Time from the sensor detection After that in sensor menu is need to press BLE settings button and add your sensor to favorite, in this way you can add sensors from favorite in adding sensor menu
Figure 9 - BLE settings
Adding sensor
Рисунок 9 – add sensors menu
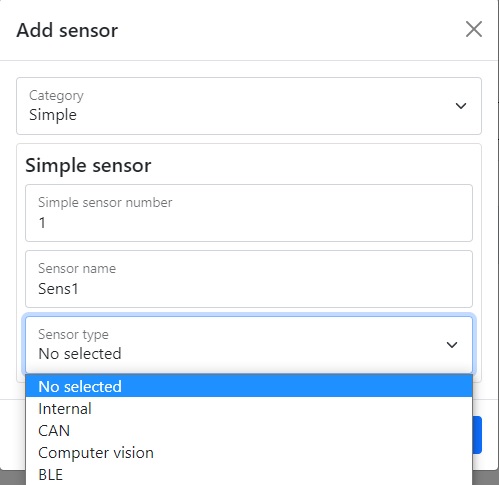
Table 1 - adding new sensor parameter description
| Parameter | Parameter description |
|---|---|
| Category | Sensor class, simple or complex |
| Sensor number | Sensor number selection |
| Sensor type | Sensor type, Internal, CAN, BLE or Computer vision |
Internal sensor type
The section contains the selection of the sensor subtype, camera number, photo count and its interval, RTSP source and reference to it, the maximum video time associated with the event, the number of photos and frames per second, video time, the interval between photos associated with the event, its count and quality content type, event type, upper and lower limit, average latency, and resubmission interval
Figure 10 – menu of internal sensor type
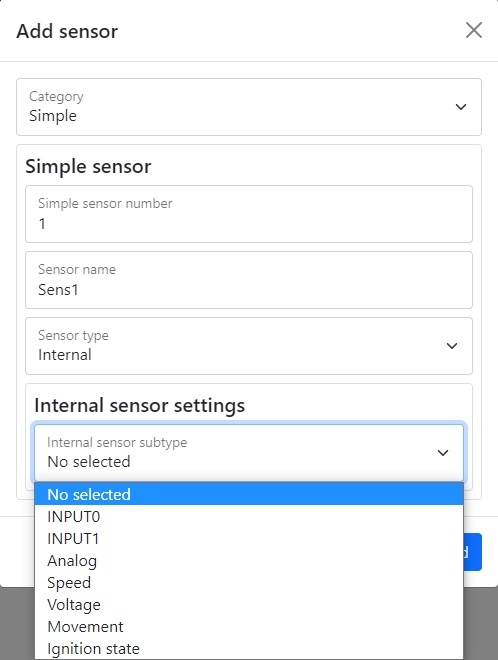
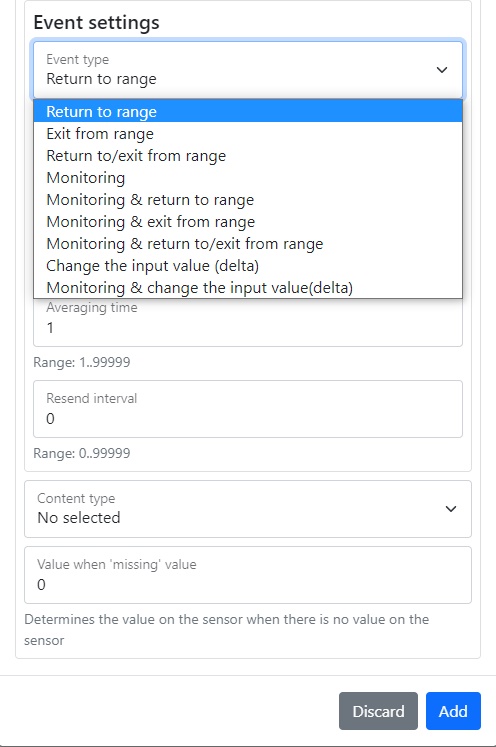
Table 2 – the description of parameters of the subtypes of the sensor internal:
| Parameter | Parameter description |
|---|---|
| INPUT 0 | Digital input 0 |
| INPUT 1 | Digital input 1 |
| ANALOG | Analog input 1 |
| SPEED | Speed sensor |
| VOLTAGE | Voltage at the input of the device |
| MOVEMENT | The status of the motion sensor on the device |
| OVERCURRENT | Overcurrent sensor |
Table 3 - description of the menu parameters Content type
| Parameter | Parameter description |
|---|---|
| Photo | Allows you to select the RTSP source, photo count, photo interval, and photo quality |
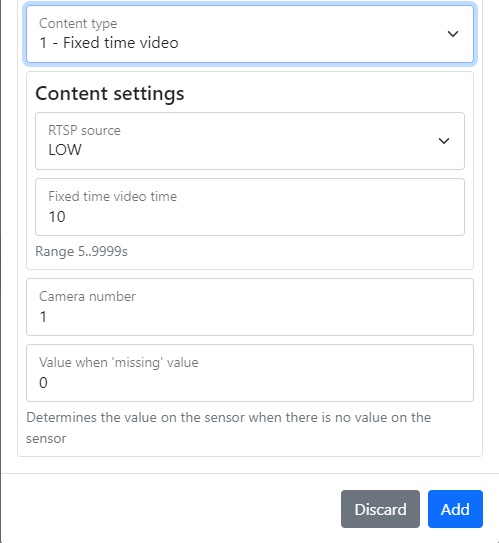
| Fixed time video | Allows you to select the RTSP source and the fixed video recording time |
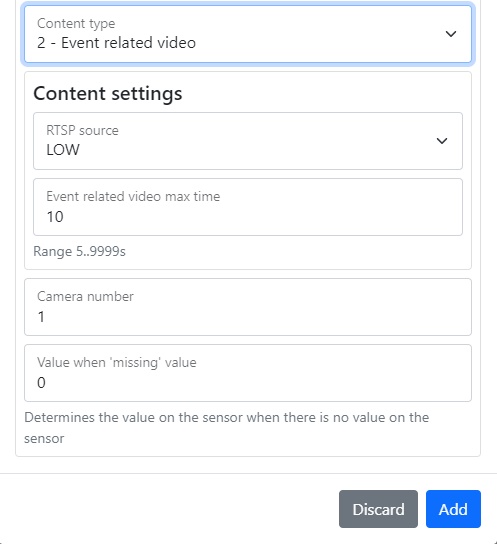
| Event related video | Allows you to select the RTSP source and the maximum video time associated with the event |
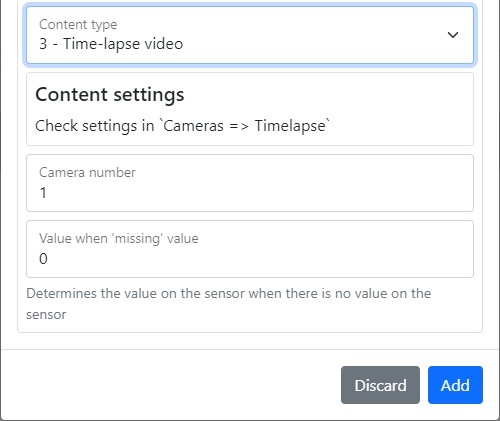
| Time-lapse video | Allows you to select RTSP links, the number of photos, the interval between them and the number of frames per second |
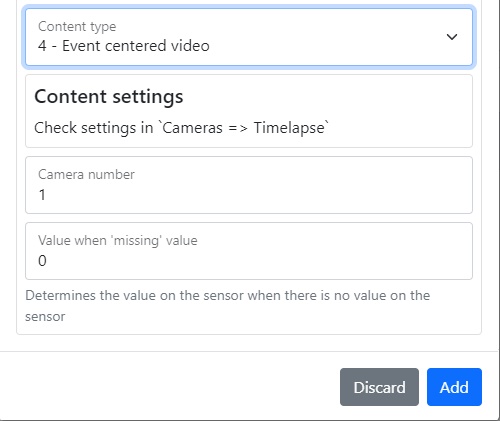
| Event centered video | Allows you to select RTSP links and video time |
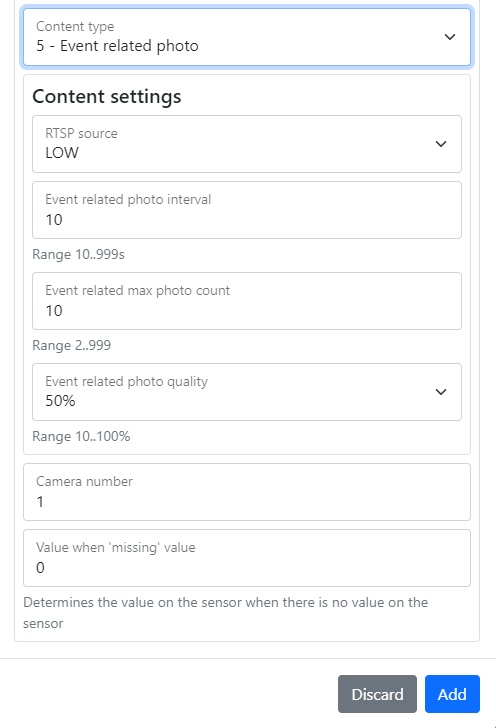
| Event related photo | Allows you to select the RTSP source, the interval between the photos associated with the event, their quantity and quality |
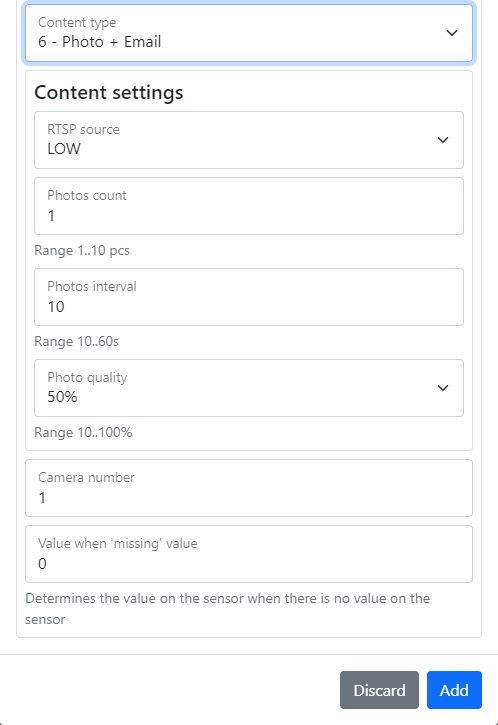
| Фото + Email | Allows you to select the RTSP source, photo count, interval between them and their quality |
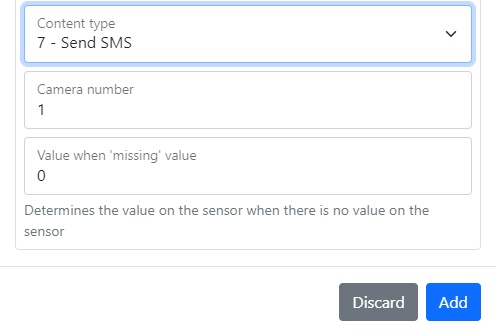
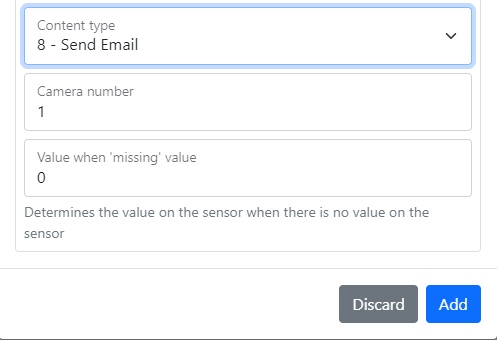
Figure 11 – types of the content

CAN Sensor type
In the section you can select the type of device and find out information about it, device variable, camera number, photo count and its interval, RTSP source and link to it, maximum video time associated with the event, number of photos and frames per second, video time , the interval between the photo associated with the event, its count and quality, the type of content and event, the upper and lower limit, the average waiting time of the bus address CAN, PGN and CAN settings
Figure 12 - menu of CAN sensor type
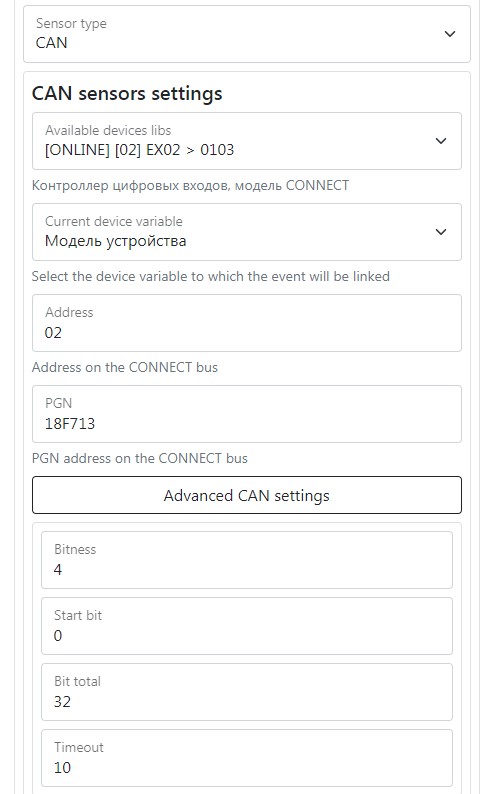
Table 2 – the description of parameters of the CAN sensor settings:
| Parameter | Parameter description |
|---|---|
| Available device libs | Available preset for connected devices |
| Current device variable | Available variables for devices |
| Address | CONNECT ID |
| Bitness | Amount of bit the will be send by defined PGN |
| Start bit | Initial value of the bit |
| Bit total | The total number of bit |
| Timeout | The pause between sending values |
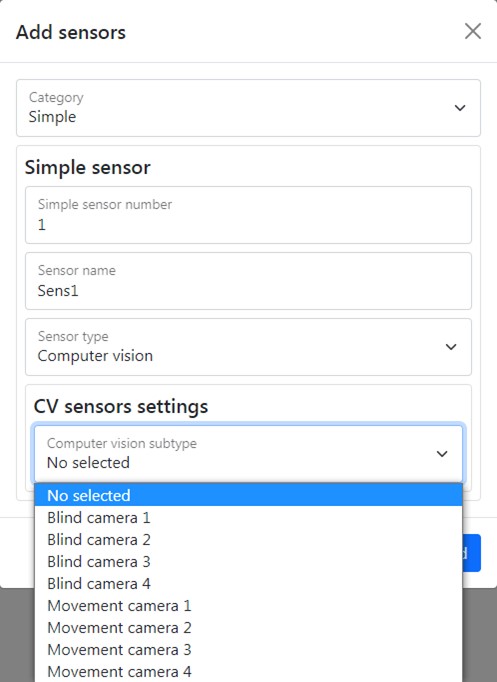
Computer vision
In the section you can select the type of event, camera number, photo count and its interval, RTSP source and link to it, maximum video time associated with the event, number of photos and frames per second, video time, interval between photos associated with event, its count and quality content type and events upper and lower limit, average latency and forwarding interval
Figure 13 - menu of Computer vision sensor type
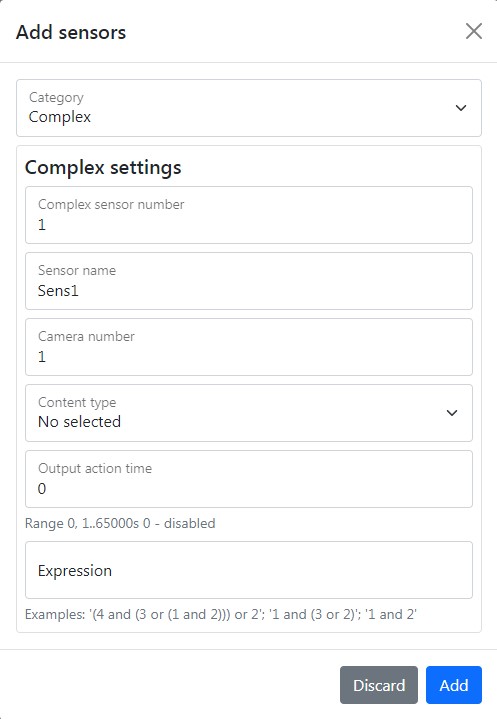
Adding complex sensor
When you create two or more sensor, you can combine it by creating complex sensor. To do that you need choose the sensor type, set output action time and write expression that should show the relationship between the sensor for their correct operation
Figure 14 – adding complex sensor menu
To set the default settings, click the Default button. To save settings in NVR click Save settings button.